Physical Address
304 North Cardinal St.
Dorchester Center, MA 02124
Physical Address
304 North Cardinal St.
Dorchester Center, MA 02124
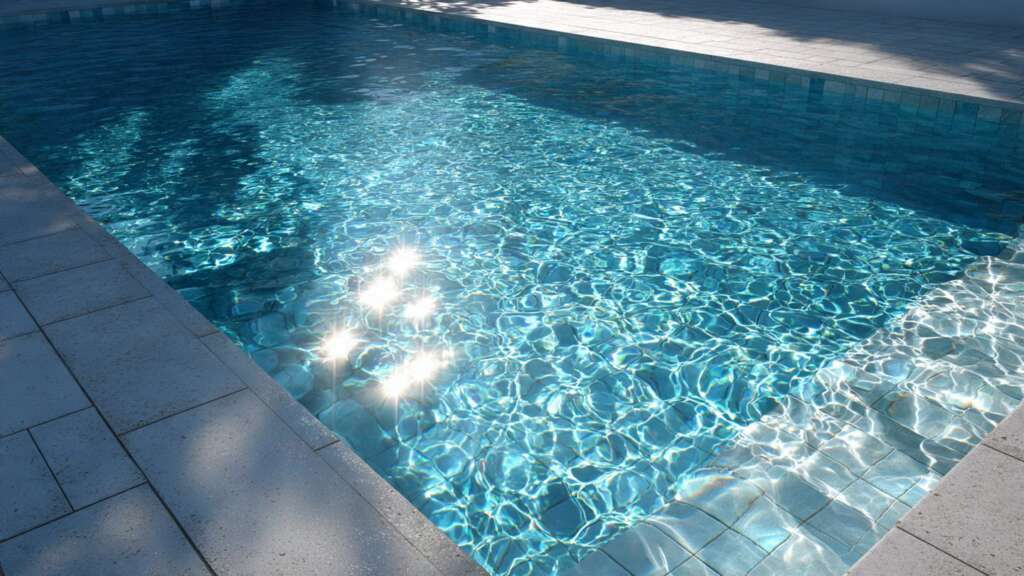
A swimming pool is one of the most enjoyable and most maintenance-intensive features a home can have. When everything is working, it’s a backyard asset that gets used constantly. When something goes wrong a slow leak, a pump that won’t prime, cloudy water that won’t clear, it can be frustrating, expensive, and time-sensitive. Left too long, minor pool problems compound into major ones.
This guide covers the full spectrum of common pool problems in practical order: how to identify what’s actually wrong, what your realistic repair options are, what it genuinely costs in 2026, and when you can fix it yourself versus when calling a professional is the only sensible choice. The repair cost data throughout comes from current Angi and HomeGuide pricing surveys. After repairing your pool, upgrade its surroundings with one of the above ground pools with deck ideas.
Understanding which category your problem falls into is the fastest path to the right solution. Most pool issues trace back to one of six root causes, and identifying the right one early prevents expensive misdiagnosis.
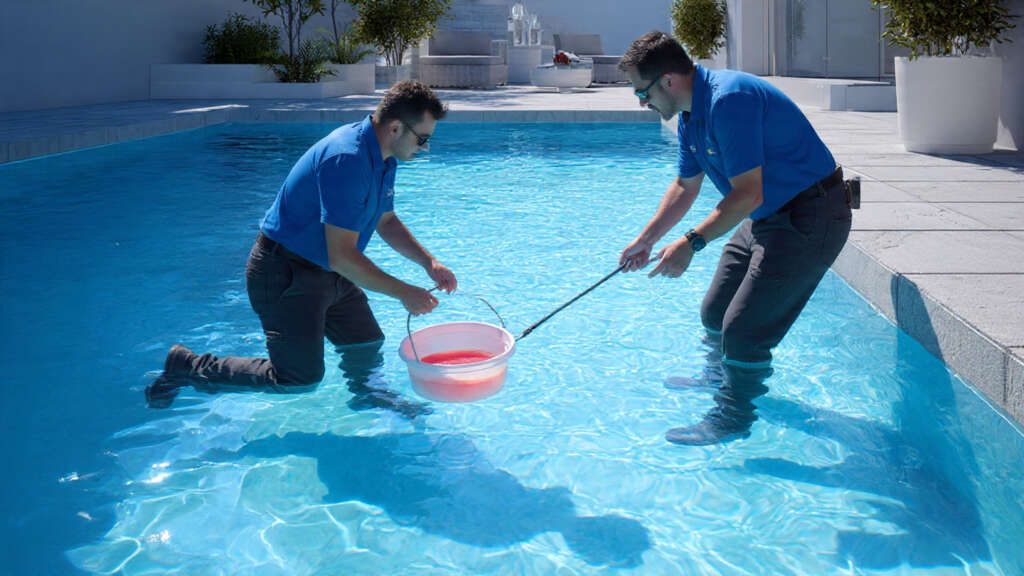
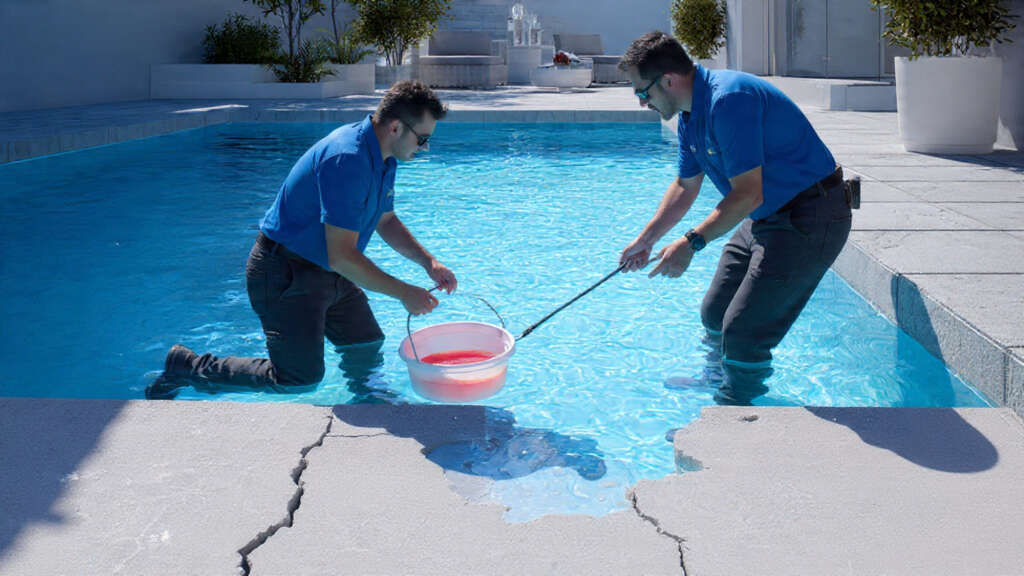
A pool losing more than ¼ inch of water per day beyond normal evaporation is leaking. Normal evaporation in warm, low-humidity climates can account for up to ¼ inch per week, but anything more than that warrants investigation. Leaks can come from the pool shell, underground plumbing lines, equipment fittings, the skimmer, or the main drain, and each source requires a different detection and repair approach.
The financial case for early leak detection is compelling. Professional detection costs $150–$500. An undetected moderate leak wastes thousands of gallons annually, adding $200–$500 to water bills and potentially causing soil erosion under the pool deck, a structural problem that can cost $5,000–$15,000 to repair if it progresses far enough.
Shell and surface leaks, cracks in concrete or plaster, vinyl liner tears, and fiberglass gel-coat blisters are usually visible and the easiest to repair. Skimmer separation (where the skimmer body pulls away from the pool shell) is one of the most common leak sources and is confirmed by the dye test: place dye near the skimmer junction and watch whether it’s drawn in. Return fitting leaks and main drain leaks follow a similar diagnostic approach.
Underground plumbing leaks are the most serious and most expensive category. These require professional pressure testing and sometimes acoustic detection or even excavation to locate. If your bucket test shows a clear leak but all visible surfaces and fittings appear intact, suspect underground plumbing. Professional leak detection using pressure testing, sonar equipment, or submersible cameras typically costs $300–$500 for in-ground pools.
⚠️ Never ignore algae appearing despite correct chemical treatment. When a pool leaks, fresh unbalanced water continuously enters the system, diluting chlorine and encouraging algae growth even when you’re dosing correctly. Persistent algae that won’t clear is a classic leak symptom that many homeowners spend months fighting with chemicals when the real fix is finding the leak.
Pool surfaces face a constant three-way assault from chemicals, UV exposure, and hydrostatic water pressure. Different materials fail in different ways, and matching the repair method to the material is essential for a lasting result.
| Pool Type | Common Surface Damage | DIY Repair | When to Call a Pro |
|---|---|---|---|
| 🔵 Concrete / Gunite | Hairline plaster cracks, flaking, staining, rough texture | Epoxy putty for hairline cracks; hydraulic cement for active leaks | Structural cracks wider than ¼ inch; widespread plaster failure; resurfacing |
| 🟡 Vinyl Liner | Small tears, punctures, wrinkles, seam separation, UV fading | Underwater vinyl patch kits for tears under 2 inches; heat gun for wrinkles | Liner age over 8–10 years; seam separation longer than 12 inches; major tears |
| 🟢 Fiberglass | Gel-coat blisters (osmosis bubbles), spider cracks, surface discoloration | Fiberglass patch kits for small cracks; limited surface buffing | Blistering (indicates moisture behind the shell); structural cracks; full gel-coat refinishing |
Individual crack repairs make sense for isolated damage. When damage becomes widespread, rough plaster texture across the floor, multiple tile losses, deep staining that acid washing won’t address, resurfacing the entire pool surface is almost always more economical than patching each problem individually. The general rule of thumb: if your concrete pool is 8–15 years since its last surface finish, and you’re dealing with recurring issues, budget for resurfacing rather than continued patching.
Resurfacing costs vary significantly by finish. Standard plaster ($4,000–$7,000 for a typical pool) is the entry point and lasts 10–15 years. Quartz plaster ($6,000–$10,000) offers better stain resistance and longer life. Pebble finishes like PebbleTec ($8,000–$12,000) are the most durable option at 15–20+ years. The higher upfront cost of pebble finishes often represents better value over a 20-year horizon compared to replastering with standard material twice.
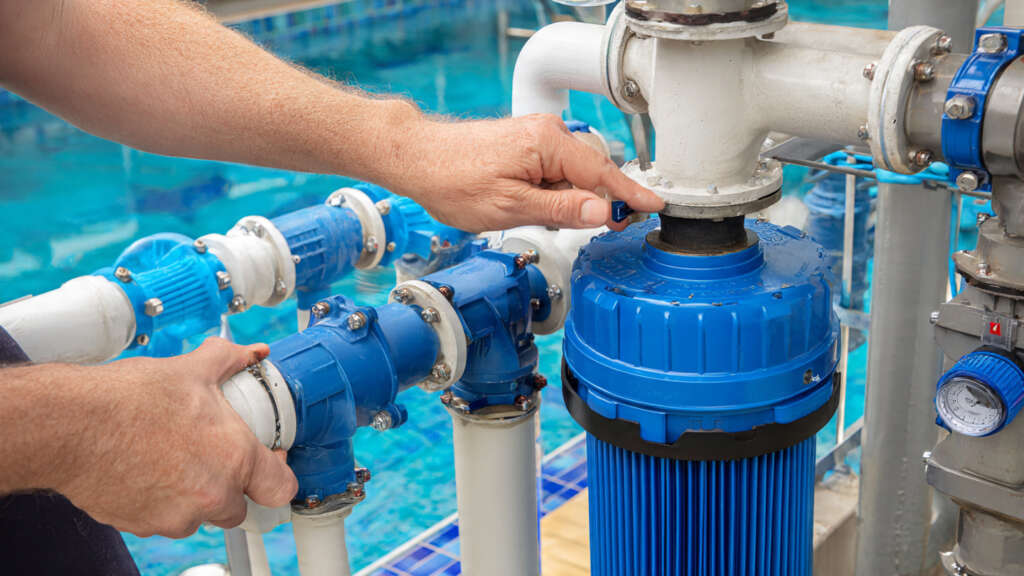
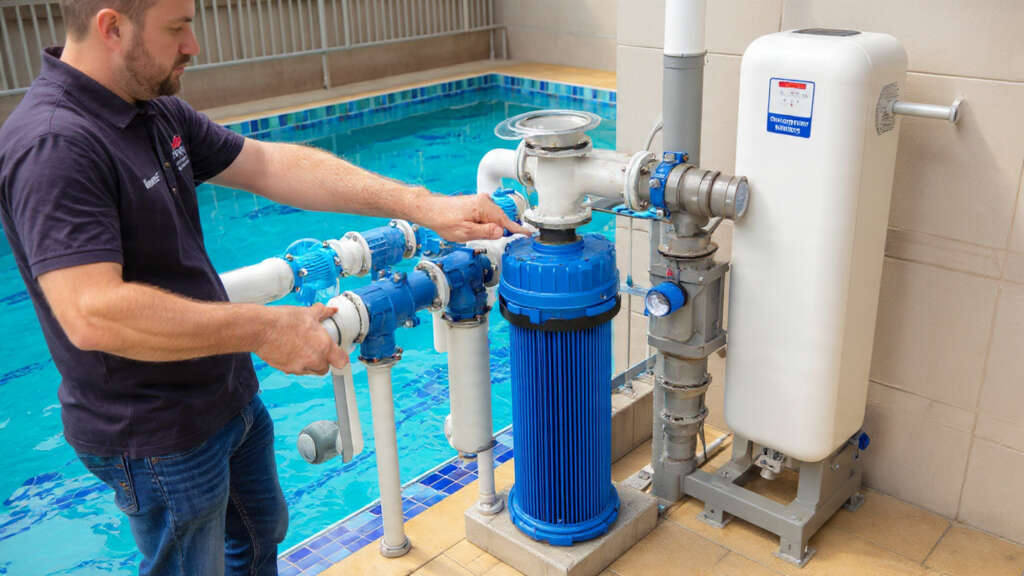
Pool pumps should last 8–12 years with proper maintenance. Most pump problems have identifiable symptoms that point to specific components rather than requiring full pump replacement. Diagnosing correctly before replacing saves significant money.
Pump won’t prime: The most common cause is an air leak in the suction line — typically a cracked lid O-ring, loose union fitting, or low water level causing the skimmer to draw air. Clean the pump basket, check the lid O-ring (replace if it’s flattened or cracked), and ensure pool water is at least halfway up the skimmer opening. O-ring replacement costs $5–$15 and is a genuine DIY fix.
Weak water flow: Almost always a dirty filter or clogged impeller. Backwash a sand filter (or clean a cartridge filter) first. If the flow doesn’t improve, remove the pump and check whether debris has blocked the impeller hair. Leaves and small debris are common culprits. A clogged impeller is a DIY fix requiring only a screwdriver and 30 minutes.
Loud grinding or screeching: Worn motor bearings. This isn’t a “run it until it dies” situation, bearing failure leads to motor burnout and significantly higher repair costs. Bearing replacement costs $50–$150 in parts; if the motor is over 7 years old, replacing the motor outright ($250–$650 including labour) is often more economical than bearing replacement.
Motor hums but won’t start: Usually, a failed start capacitor is a $20–$40 part that can be replaced by a competent DIYer. If the motor is seized or shows burn marks or corrosion, replace the entire unit.
The type of filter determines the maintenance approach. Sand filters need backwashing when pressure rises 8–10 psi above the clean baseline, typically every 4–6 weeks in season. Sand should be replaced every 3–5 years as the grains become rounded and lose filtration efficiency. Cartridge filters need rinsing every 2–4 weeks and replacement every 1–2 years, depending on use. DE (diatomaceous earth) filters offer the finest filtration but require the most maintenance. DE must be added after every backwash and replaced annually.
🌿 Energy-saving upgrade: If your pump is more than 5 years old and running on a single-speed motor, upgrading to a variable-speed pump is the single highest-impact money-saving change you can make to your pool setup. Variable-speed pumps save $1,000–$1,500 per year in electricity costs versus older single-speed models, paying back a $1,200–$2,000 installation cost in 18–24 months. Many US states also offer rebates for variable-speed pump upgrades.
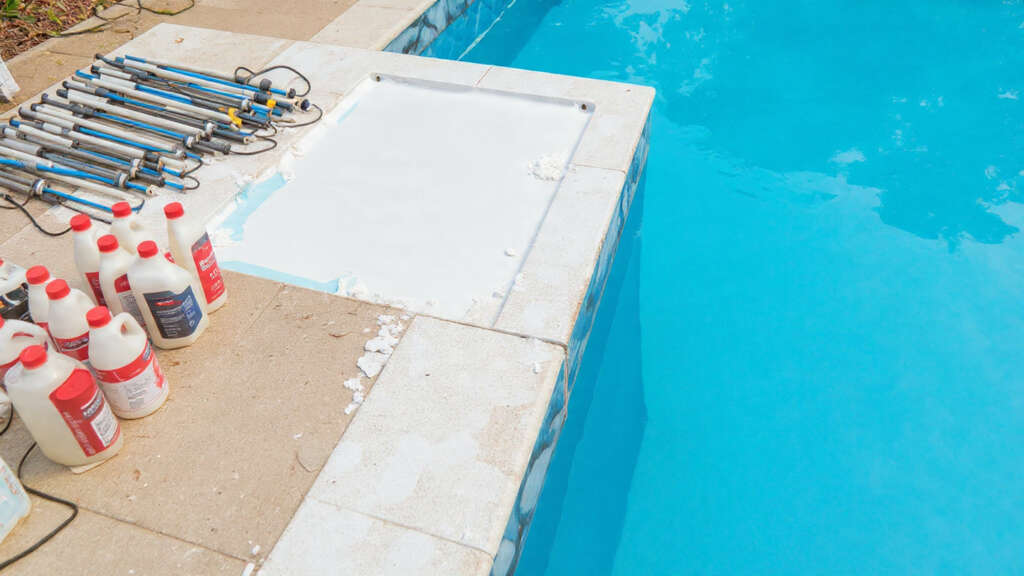
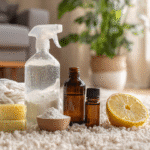
Water chemistry is the area where consistent attention pays the biggest dividends and where neglect causes the fastest damage. Out-of-range pH, even without any other problem, will bleach vinyl liners, corrode metal equipment, irritate swimmers’ eyes, and render chlorine significantly less effective.
| Parameter | Target Range | What Goes Wrong Outside Range |
|---|---|---|
| pH | 7.2 – 7.6 | Below 7.2: corrodes surfaces, equipment, and irritates skin. Above 7.8: chlorine loses effectiveness; scaling forms. |
| Free Chlorine | 1 – 3 ppm | Below 1 ppm: bacteria and algae establish within hours in warm water. Above 5 ppm: irritates skin, eyes, and bleaches swimwear. |
| Total Alkalinity | 80 – 120 ppm | Low alkalinity causes pH to fluctuate wildly pH becomes almost impossible to stabilise. High alkalinity causes scaling and cloudy water. |
| Calcium Hardness | 200 – 400 ppm | Too low: water becomes aggressive and leaches calcium from pool surfaces. Too high: white scaling on surfaces and equipment. |
| Cyanuric Acid | 30 – 50 ppm | Too low: chlorine destroyed by UV within hours. Too high (above 80 ppm): chlorine becomes less effective — water becomes difficult to sanitise. |
A green pool is an algae bloom, almost always caused by chlorine falling below effective levels, often combined with a warm spell and heavy use. The standard treatment: shock the pool with a large chlorine dose (typically 1 lb of shock per 10,000 gallons, doubled for heavy algae), brush all surfaces thoroughly to break up algae colonies and expose them to the chemical treatment, then run the filter continuously until the water clears, typically 24–72 hours. Vacuum debris to waste (not through the filter) after the algae dies to avoid clogging your filter with dead organic matter.
Cloudy water without algae usually indicates a filtration problem (dirty filter, insufficient run time), high pH, or fine particle debris. Check and clean the filter first, then test and adjust pH to the 7.2–7.4 range. A clarifier or flocculant can accelerate clearing. If needed, flocculant causes particles to clump and sink to the floor for vacuuming, while clarifier causes them to clump large enough for the filter to catch.
Pool electrical and plumbing work falls in the same category as other high-stakes home repairs worth understanding before starting the cost of mistakes in these areas far exceeds professional fees.
🔵 Rule of thumb: If the repair involves electricity, gas, underground plumbing, structural concrete, or any work that requires draining the pool, call a certified pool technician. Professional pool repair pros typically charge $45–$65 per hour for labour. A misdiagnosed DIY repair that makes a problem worse almost always costs more than the original professional fix would have.
Pool repair costs vary significantly by region, pool type, damage severity, and whether the job requires emergency service. The figures below are drawn from Angi’s 2026 pool repair cost data, and HomeGuide’s pricing surveys use them as realistic ballpark estimates when getting quotes.
| Repair Type | Cost Range (2026) | Notes |
|---|---|---|
| Pool leak detection (professional) | $150 – $500 | Inground pools with underground plumbing at higher end; above-ground at lower end |
| Pump motor repair | $50 – $300 | Bearings, capacitor, seals, labour included |
| Pump motor replacement | $250 – $650 | Replacing motor only; full pump replacement $700–$1,300 |
| Filter replacement | $250 – $2,000 | Cartridge at lower end; DE filter at higher; sand filter mid-range |
| Skimmer repair / replacement | $50 – $1,200+ | Ignitor, thermostat, minor components; heat exchanger replacement at the higher end |
| Minor plaster crack repair | $150 – $500 | Small surface patching only |
| Pool resurfacing (standard plaster) | $4,000 – $7,000 | Typical residential pool; includes drain, resurface, refill |
| Pool resurfacing (pebble finish) | $8,000 – $12,000 | 15–20 year lifespan; higher upfront, better long-term value |
| Vinyl liner replacement | $1,000 – $3,500 | Above-ground at lower end; inground full liner at higher end |
| Pool heater repair | $200 – $1,200 | Ignitor, thermostat, minor components; heat exchanger replacement at higher end |
| Variable-speed pump install | $1,200 – $2,000 | Saves $1,000–$1,500/year in electricity; pays back in 18–24 months |
| Pool drain and refill | $180 – $230 (drain) + $55/5,000 gal (refill) | Inground pools with underground plumbing at the higher end, above-ground at the lower end |
A $300 professional leak detection service can prevent $10,000+ in structural damage when problems are caught early. The cost of ignoring pool leaks almost always exceeds the cost of finding and fixing them promptly.
.
When a pool requires major repairs or resurfacing, it creates a natural opportunity to upgrade aging equipment at the same time. Bundling upgrades with planned renovation work avoids duplicate service call fees and often reduces total project cost significantly.
Variable-speed pump ($1,200–$2,000 installed) is the highest-return single upgrade available. A standard single-speed pump from 2010 costs $80–$120 per month to operate. A variable-speed replacement brings that to $20–$35 per month, a saving of $720–$1,440 annually. Payback period is typically 18–24 months, after which the savings are permanent. Many US states and utility companies offer rebates of $100–$400 on qualifying variable-speed pump installations.
LED pool lighting ($700–$1,500 installed) uses approximately 75% less electricity than traditional incandescent pool lights and lasts 3–5 times longer. The combination of lower operating cost and dramatically reduced replacement frequency makes the upgrade financially rational for most pools with older lighting systems.
Solar pool cover ($60–$200) is the highest-return low-cost upgrade. A properly sized solar cover reduces water evaporation by up to 95%, reduces chemical loss (because chemicals evaporate with water), and passively heats the pool using solar energy, reducing heating costs by $500+ annually in many climates. For pools in sunny regions, a solar cover can effectively eliminate the need for pool heating equipment for several months of the year.
A robotic pool cleaner ($600–$1,200) eliminates the most time-consuming maintenance task. A quality robotic cleaner cleans the floor, walls, and waterline automatically in 2–3 hours and pays for itself within a year if it replaces a professional cleaning service ($100–$200/month). For households managing the pool independently, it reduces hands-on maintenance time to under 20 minutes per week. Thinking about adding more to your backyard? Check out this complete hot tub cost breakdown before you decide.
The bucket test is the most reliable first step. Place a filled bucket on a pool step, mark both the bucket water level and the pool water level, and compare the loss after 24 hours with the pump running. If the pool lost significantly more than the bucket, you have a structural or plumbing leak beyond normal evaporation. In most climates, normal evaporation accounts for up to ¼ inch per week; anything more than ¼ inch per day warrants investigation. Wet spots around the deck, rising water bills, and algae that won’t respond to treatment are all secondary indicators.
Air leaks in the suction line (causing loss of prime) and clogged impellers (causing weak flow) are the two most frequent pump issues. Both are DIY-fixable in most cases, Family Handyman’s pool pump troubleshooting guide, and remove and clear the impeller for the latter. Bearing failure (identified by grinding or screeching sounds) and capacitor failure (motor hums but won’t start) are the next most common issues. A pump that’s over 8–10 years old and experiencing multiple problems is generally more economical to replace than to continue repairing.
Standard plaster resurfacing for a typical residential pool costs $4,000–$7,000 and is typically needed every 10–15 years. Quartz plaster ($6,000–$10,000) extends that to 12–18 years. Pebble finishes ($8,000–$12,000) last 15–20+ years and represent better long-term value despite the higher upfront cost. Signs that resurfacing is needed rather than spot repairs include rough texture that scratches feet, widespread plaster flaking, hollow spots when tapping the surface, and staining that acid washing won’t address. A professional inspection can usually distinguish between a pool that needs resurfacing and one that can be maintained with targeted repairs for several more years.
Some pool leaks are genuinely DIY-fixable: small vinyl liner tears (using an underwater patch kit), minor surface cracks (using hydraulic epoxy), and equipment leaks from worn O-rings or loose fittings. The bucket test and a dye test can help you identify whether the leak is in the shell, the fittings, or the plumbing. Underground plumbing leaks, structural concrete cracks, skimmer body separation, and main drain leaks require professional detection and repair; attempting these without professional tools and expertise typically results in incomplete fixes and recurring problems.
Several possibilities: first, check cyanuric acid (stabilizer) levels if they’re above 80 ppm; chlorine becomes ineffective regardless of dose, a condition called “chlorine lock.” Partially draining and refilling the pool to dilute the stabilizer is the fix. Second, if you have a pool leak, fresh water continuously diluting your chemicals can make maintaining effective chlorine levels nearly impossible. Third, verify that your pH is in the 7.2–7.6 range. Chlorine’s sanitising effectiveness drops dramatically as pH rises above 7.8. Finally, ensure your filter is running long enough (8–12 hours daily in summer) and is clean enough to actually remove debris and dead algae.
Yes, for the vast majority of pool owners. A variable-speed pump running at lower speeds for longer periods provides better filtration than a single-speed pump running at full speed for fewer hours, while using less electricity. The annual electricity saving of $1,000–$1,500 versus a standard single-speed pump pays back a $1,200–$2,000 installation cost in 18–24 months. After payback, that saving continues indefinitely for the 10–15-year life of the pump. Many US states also offer utility rebates of $100–$400 on qualifying installations, further improving the payback calculation.
Pool problems follow a clear pattern: they start small and get expensive when ignored. A $300 professional leak detection can prevent $10,000+ in structural repair. A $15 O-ring replacement can prevent a $1,300 pump failure. The common thread is that early identification of the right problem leads to the cheapest and most effective fix.
For most homeowners, the ideal approach combines consistent DIY maintenance (weekly chemistry testing, basket cleaning, skimming, and brushing) with professional inspections for anything involving plumbing, electricity, structural concrete, or heating systems. The 30 minutes per week of routine maintenance prevent the overwhelming majority of emergency repair calls. Combining DIY maintenance with professional help for complex jobs requires building your home maintenance and repair skills over time.
If you’re planning a major repair or resurfacing project, treat it as an opportunity to upgrade aging equipment simultaneously, particularly if your pump is a single-speed model more than 5 years old. The efficiency gains from a variable-speed pump alone will meaningfully offset the cost of any renovation project over time.
For more home maintenance guides, explore our Maintenance & Repair section.