Physical Address
304 North Cardinal St.
Dorchester Center, MA 02124
Physical Address
304 North Cardinal St.
Dorchester Center, MA 02124
Garage door torsion springs are under 150–300+ lbs of stored tension. If a winding bar slips during the process, the spring can violently unwind and cause severe facial injuries, broken fingers, or worse. Thousands of homeowners are treated in emergency rooms each year from garage door spring accidents. If you have any doubt about your ability to complete this safely, call a licensed garage door technician. Professional replacement typically costs $150–$350 and takes under an hour — far less than an ER visit.
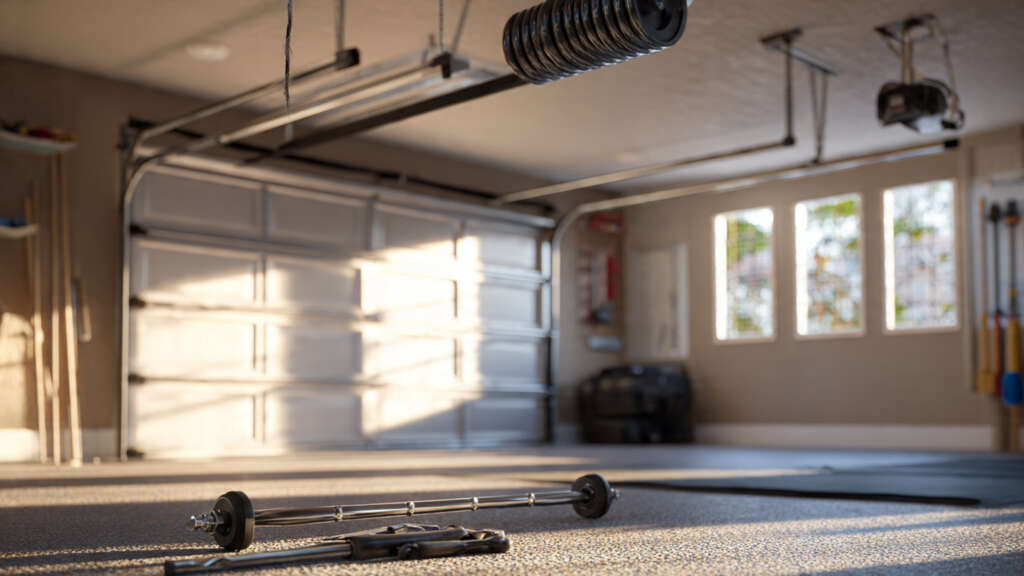
Your garage door is one of the heaviest moving objects in your home — and the springs are what make it possible to open with one finger. When a spring breaks or wears out, the door becomes dangerously heavy and can slam shut without warning. Replacing the springs restores safe operation and protects your opener from burning out trying to compensate.
This guide covers everything: how to identify which type of spring system you have, how to measure for the right replacement, and a full step-by-step process for both torsion and extension spring types, along with an honest assessment of when DIY is reasonable and when it is not. Before tackling complex repairs, build your skills at these DIY home improvement workshops for homeowners.
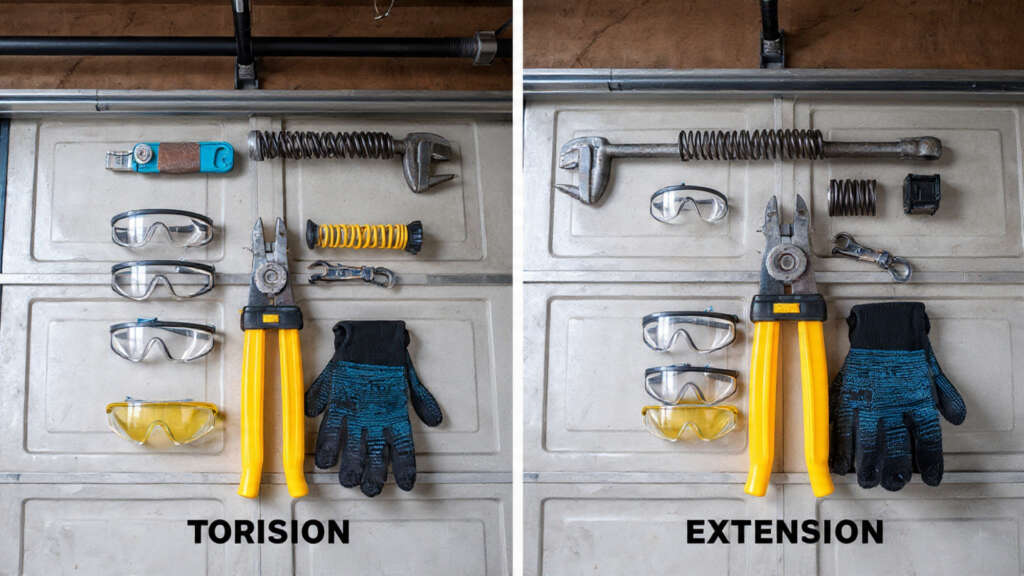
Before you order any parts or pick up a tool, you need to identify which spring system your garage door uses. The two types look completely different, use different replacement procedures, and require different tools. Getting this wrong will cost you time and money.
| Feature | Torsion Springs | Extension Springs |
|---|---|---|
| Location | Mounted horizontally above the door opening on a metal shaft | Mounted along the horizontal tracks on each side of the door |
| How They Work | Wind and unwind around the shaft to store and release torque energy | Stretch and contract as the door opens and closes |
| Lifespan | 10,000–20,000 cycles (7–15 years) Longer | 5,000–10,000 cycles (5–10 years) |
| Safety | Contained when they break Safer | Can fly violently if no safety cable is installed Riskier |
| DIY Difficulty | Advanced — requires winding bars and precise turn counts | Moderate — simpler but still requires care |
| Cost to Replace (Pro) | $200–$350 (parts + labor) | $150–$250 (parts + labor) |
| Common On | Heavier doors, newer homes, double-car garages | Lighter doors, older homes, single-car garages |

Springs don’t always break with a loud bang, they often give warning signs for weeks before they fail. Catching these early means you can schedule a replacement on your own terms rather than being locked out of your garage unexpectedly.
💡 Pro Tip: If one spring breaks on a two-spring system, replace both at the same time. The second spring has experienced the same number of cycles and will likely fail within weeks. Replacing one at a time means two service calls and double the labor cost.
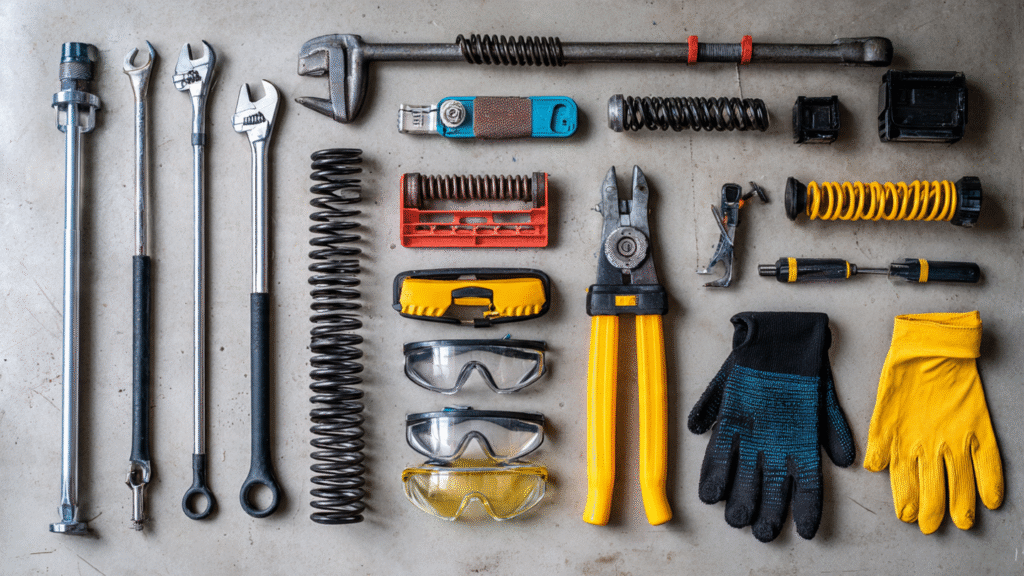
For torsion springs specifically, having the correct tools is not optional; it is a safety requirement. Improvised tools cause the majority of DIY garage door spring injuries. While improving your home’s safety, also consider these smart DIY tips to reduce radon levels without major renovations.
Screwdrivers, crowbars, wooden dowels, rebar, or any tool not designed as a certified winding bar can snap under the spring tension. When a winding bar fails, the spring unwinds violently and the bar becomes a projectile. Use only properly sized, certified solid-steel winding bars with a diameter that fits snugly into your spring’s winding cone holes.
Ordering the wrong spring is one of the most common DIY mistakes, and it means starting the disassembly process twice. Take all four measurements before purchasing anything. If possible, measure both springs even if only one is broken, as the specifications should match exactly.
1. Wire diameter: Count 20 coils on the spring and measure that length with a tape measure. Divide by 20 to get the wire diameter. For example, 20 coils measuring 4.5 inches = 0.225″ wire diameter. Most residential springs range from 0.177″ to 0.262″.
2. Inside diameter: Measure the opening through the center of the coil. Standard sizes are 1¾”, 2″, and 2¼”.
3. Overall length: Measure the full length of the spring, including both cones. If the spring is broken, measure each piece and add them together, then round up to the nearest whole inch.
4. Wind direction: Look at the winding cone end. If the coils run clockwise from the cone, it’s a right-hand wound (RH) spring, which goes on the left side of the center bracket. Counter-clockwise = left-hand wound (LH) goes on the right side.
🟢 Note: Torsion springs always come in paired sets for two-spring systems. Order both as a matched pair with identical specifications to ensure balanced tension on both sides of the door.
Work slowly and methodically. Never rush any step, and stop immediately if something feels wrong or unexpected. If in doubt at any point, set the tools down and call a professional.
Close the garage door fully. Pull the red emergency release cord to disconnect the door from the automatic opener. Unplug the opener from the power outlet — this prevents any accidental activation while you work.
Clamp two vise grips or C-clamps to the vertical tracks just below the bottom rollers on each side. This prevents the door from rising if the springs are accidentally wound during the process.
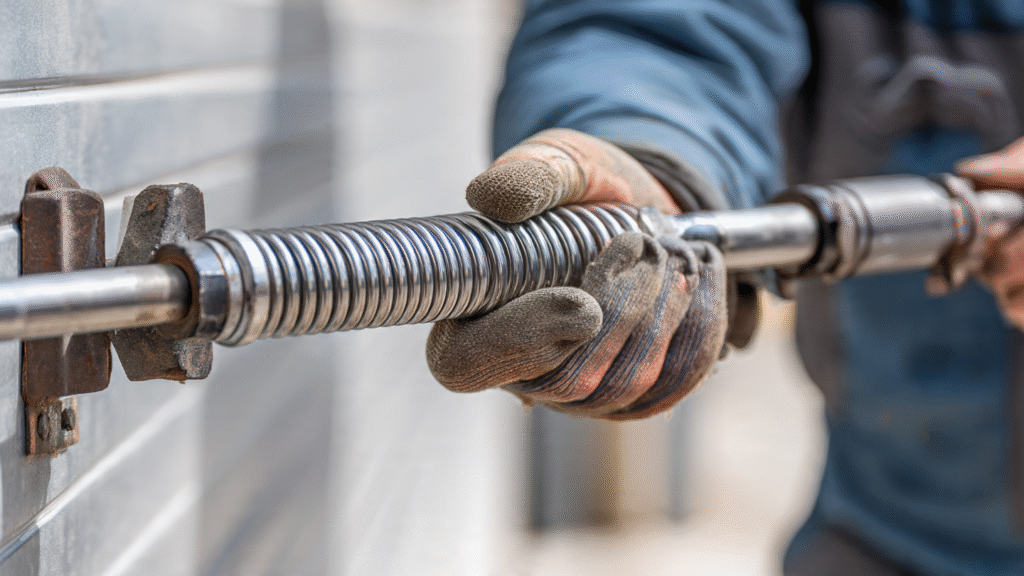
Insert a certified winding bar into the bottom hole of the winding cone. Hold it firmly with both hands at chest height. With your second winding bar inserted in the upper hole for control, use a wrench to loosen the two set screws — you’ll feel the tension transfer to the bar in your hands as you do this.
With the bar under tension, lower it slowly to rest against the top of the door. Insert the second bar in the next hole up, remove the first bar, and lower it to rest against the door. Repeat this alternating process — approximately 30 quarter-turns for a standard 7-foot door — until all tension is released and the bars rest freely.
Loosen the set screws on each cable drum at the far ends of the torsion shaft. Let the cables go slack and unwrap them from the drums. With a 9/16″ wrench, unbolt the stationary cones at the center bracket. Slide each spring along the shaft toward the far end and off the bar.
Pull the torsion shaft slightly out of its end bearing plate — just enough to remove the drum and spring. Note which side each spring came from so the new ones go back in the correct position.
Slide the new spring onto the torsion bar from the correct end (LH spring on the right side of center bracket, RH spring on the left). Reinstall the cable drum and slide the bar back into the end bearing plate. Bolt the stationary cone to the center bracket — finger tight first, then snug with the wrench. Do not overtighten cracked or damaged cones.
Reattach the lifting cables to the cable drums. Thread the cable into the slot on the drum, pull it taut, and tighten the drum set screws while holding the cable under tension. Repeat for the other side. Both cables should have identical tension — like guitar strings, firm but not straining.
This is the most critical step. Insert a winding bar into the bottom hole of the winding cone. Wind upward in quarter-turns, alternating bars as you go. The formula for standard residential doors is: 4 quarter-turns per foot of door height, plus 2 extra turns.
For a 7-foot door: (7 × 4) + 2 = 30 quarter-turns total. For an 8-foot door: (8 × 4) + 2 = 34 quarter-turns. As you wind, the spring should grow slightly in length — if it shortens, stop immediately and reverse, as the spring is on the wrong side.
After reaching the correct count, tighten the set screws firmly with a socket wrench while keeping one winding bar in the cone for safety. Tap each set screw with a hammer to seat it fully, then tighten a half-turn more.
Remove the vise grips from the tracks. Lubricate the full length of both springs with a silicone or lithium-based spray — this reduces friction, prevents rust, and extends spring life significantly. Do not use WD-40, which evaporates quickly and attracts dust.
Manually lift the door to waist height and let go. A properly balanced door will stay in place. If it rises on its own, unwind each spring 1–2 quarter-turns. If it falls, add 1–2 quarter-turns per side. Once balanced, reconnect the opener and run a full open/close cycle test. Listen for smooth, even operation without straining sounds from the motor.
Extension spring replacement is more accessible for DIY homeowners than torsion springs, but it still requires care. The springs are located along the horizontal tracks on each side and must be replaced as a pair.
Open the door all the way so the extension springs are in their relaxed, fully extended state. Disconnect the opener. Clamp the door to the overhead track with C-clamps to prevent it from moving while you work. Extension springs are under tension when the door is closed, not when it’s open — this is the opposite of torsion springs.
Unhook the safety cable that runs through the center of the spring (if present — if there is no safety cable, add one when installing the new spring). Disconnect the spring from the rear bracket at the back of the track, then from the pulley bracket near the front. Slide the spring off and set aside.
Thread the safety cable through the new spring before attaching it. Hook the spring to the rear bracket first, then to the pulley bracket near the front. Ensure the cable is routed correctly through the pulleys following your earlier photo. Repeat identically on the other side — both sides must have equal tension.
Remove the C-clamps, close the door manually, and test. The door should lift smoothly and hold position at the halfway point. If one side is heavier, check that both springs are the same specification and both are hooked to the same point on their respective brackets.
Understanding the real cost of each approach helps you make the right decision for your situation and budget. A professional spring replacement typically costs $150–$350, according to Angi’s 2026 pricing data.
| Expense | DIY Cost | Professional Cost |
|---|---|---|
| Torsion spring pair (standard) | $30–$80 | included |
| Extension spring pair | $15–$40 | included |
| Winding bars (one-time purchase) | $20–$35 | N/A |
| Other tools (wrench, clamps, etc.) | $20–$50 if not owned | N/A |
| Labor | $0 | $75–$150/hr |
| Total: Torsion spring replacement | $70–$165 | $150–$350 |
| Total: Extension spring replacement | $35–$125 | $100–$250 |
| Time investment | 2–4 hours (first time) | 30–60 minutes |
| Warranty on parts & labor | None | Typically 1–3 years |
If any of the following apply, do not attempt DIY replacement; call a licensed garage door technician:
The cost difference between DIY and professional for a standard replacement is approximately $100–$200 not worth the risk of an ER visit.
Lubricate every 3 months. Apply a silicone-based or white lithium grease spray to the full length of the spring coils. This reduces metal-on-metal friction during winding and unwinding, prevents rust formation, and can add years to the spring’s life. Never use WD-40; it is a degreaser and solvent, not a lubricant, and it evaporates within days.
Test the door balance monthly. Disconnect the opener, lift the door manually to waist height, and let go. It should stay put. If it drops or rises on its own, the spring tension needs adjustment. This is a job for a professional unless you’re experienced with the winding process.
Inspect for rust and wear visually every season. Look for surface rust, kinks, stretched coils, or gaps forming in the spring. Catching a spring nearing the end of its life before it snaps lets you schedule a planned replacement rather than an emergency one.
Keep the tracks clean. Dirt and grime are part of a broader home maintenance routine. See our guide to natural DIY home cleaning solutions for more ways to keep your home in top shape without harsh chemicals.
Schedule an annual professional inspection. A garage door technician can spot worn cables, failing bearings, and other components that interact with the springs. Catching a fraying cable before it snaps prevents it from taking out the drum or damaging the spring when it goes.
How do I know if I have torsion or extension springs?
Look above your garage door with the door closed. If you see a horizontal metal bar with coiled springs wrapped around it running across the full width of the door, you have torsion springs. If you see springs running along the horizontal side tracks on the left and right, you have extension springs. Most modern homes with heavier sectional doors use torsion springs.
Can I open my garage door with a broken spring?
Technically, yes, by pulling the emergency release cord and lifting manually, but only if necessary. Without a spring, a standard garage door weighs 150–300 lbs, depending on size and material. Lifting that weight poses a back injury risk, and if it falls, it can damage anything below. If you must open the door, have a second person support it while you move the vehicle, then close it and call for repair.
Do I need to replace both springs even if only one broke?
Yes, always replace both springs on a two-spring system at the same time. Both springs have experienced identical wear over the same number of cycles. When one breaks, the other is typically near failure. Replacing just one leaves an imbalanced door, strains the opener, and almost guarantees a second service call shortly after.
How many turns do I wind a torsion spring?
The standard formula is 4 quarter-turns per foot of door height, plus 2 additional quarter-turns. For a 7-foot door: (7 × 4) + 2 = 30 quarter-turns. For an 8-foot door: (8 × 4) + 2 = 34 quarter-turns. Always verify with a door balance test afterward and adjust turns as needed. Heavier doors may require slightly more tension.
How long do garage door springs last?
Spring lifespan is measured in cycles, not years. Standard torsion springs are rated for 10,000 cycles; high-cycle springs for 20,000+. A family using the garage 4 times per day will reach 10,000 cycles in about 7 years. Extension springs typically last 5,000–10,000 cycles. If your springs are over 7 years old and showing signs of wear, proactive replacement is more cost-effective than emergency repair.
What’s the difference between standard and high-cycle springs?
Standard residential springs are rated for 10,000 cycles and cost $15–$40 each. High-cycle springs are made from heavier wire and rated for 20,000–50,000 cycles, costing more upfront ($50–$150 each) but lasting much longer. They are worth the investment on frequently used garage doors, especially in households with multiple drivers.
Replacing garage door springs is one of the more demanding DIY home maintenance tasks, not because it’s technically complex, but because the consequences of a mistake are genuinely serious. Extension springs are accessible for a careful, prepared homeowner. Torsion springs require more respect, the right tools, and ideally some experience with high-tension mechanical systems.
If you’re comfortable with the process after reading this guide, go slowly, use proper equipment, and never skip the safety steps. If you have any hesitation, the $150–$350 for professional installation is genuinely good value. A working garage door you can rely on every day is worth more than the savings from a DIY job that goes wrong.
For more home maintenance guides, explore our Maintenance & Repair section, or read our guide on DIY home improvement skills to build your confidence before tackling projects like this.